
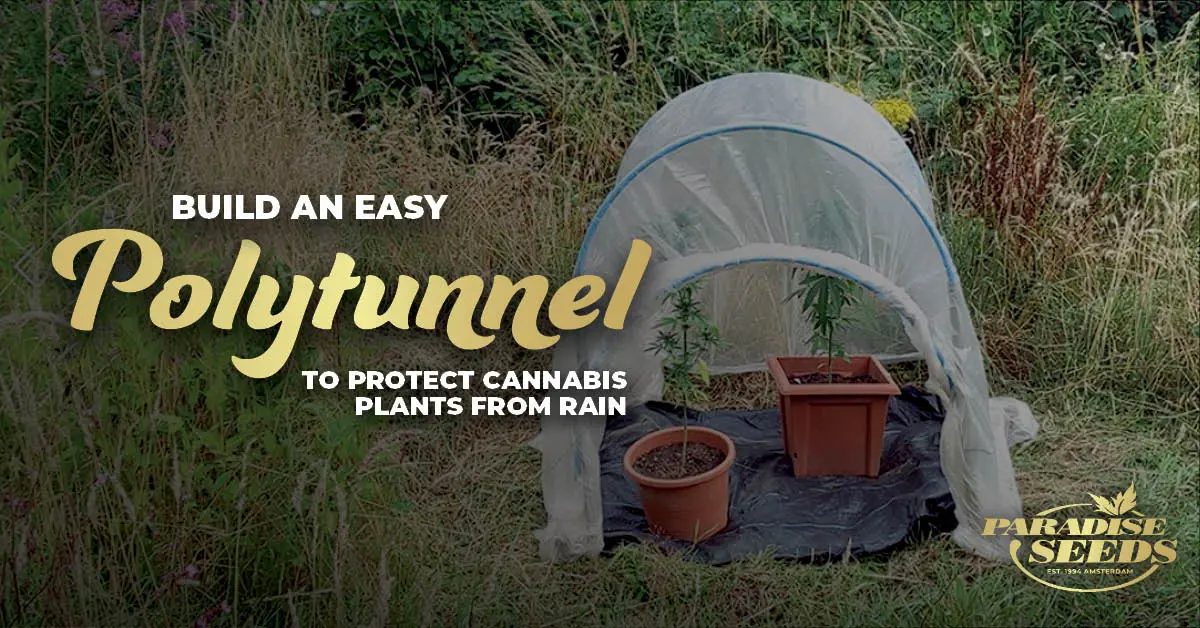
If you are growing photoperiod weed strains outdoors in the northern hemisphere, then autumn can be a bittersweet time. Outdoor weed plants will start flowering, but the summer sun often gives way to autumn rain and cool nights, which can cause problems with mold.
Now is a good time to consider how you can protect your plants from being exposed to prolonged periods of rain. Don’t panic, we have an easy solution in the form of the instructions for a one hour polytunnel (or plastic greenhouse) shelter! With the cost of everything rising at the moment, this is also a very cheap polytunnel.
Paradise friend, Mr Beanzz, gives a step by step guide on how to make a simple cannabis polytunnel to protect weed plants from rain. Use the photos for reference and also check out the video on the Paradise Seeds Youtube channel. Let’s start with the instructions!
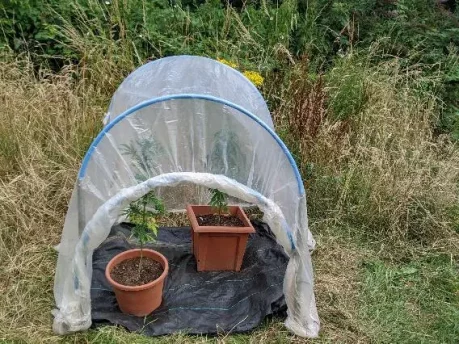
The following guide is for a 1m x 1m polytunnel shelter which will give shelter for at least 2 plants. It’s temporary and its small, so height is restricted (to approximately 1.5 meters). For this reason it is better suited to autoflower plants or indica plants which don’t grow so tall. In this guide, we are using plants in pots, which are inevitably smaller.
Cannabis polytunnel preparation
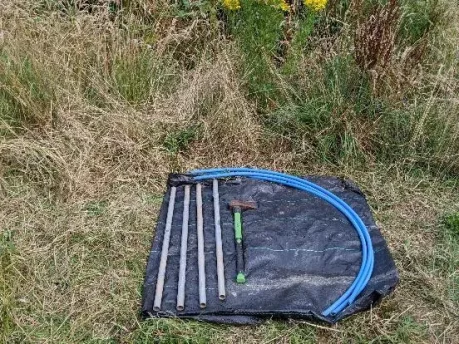
Before the build, it’s time to prepare! You will need:
- Good location and a base. Select somewhere that is sheltered from the worst of the wind if possible. A mat base is advisable as it keeps vegetation down and helps with pest control. Weed matting, plastic sheeting or tarpaulin are great options.
- 4 hollow poles (1-1.5m long). These came from an old tent but you could also use scaffold poles cut to lengths or metal plumbing pipe. As they are hollow, the hoop ends can slot inside. If you can’t find hollow poles no problem. You can even cut branch lengths and shape the ends so the hoops fit over instead of inside.
- 3 – 4 plastic hoops.
Use blue plastic plumbing pipe – small rolls are cheap on eBay. Cut them into lengths and be generous as excess length will just go further down the tubes. Before you buy, it’s advisable to know the diameter of your poles (and if you are slotting hoops inside or sliding them over poles). For this structure, the poles have a 30mmm diameter and the pipe is 15mm). For a 1m, x 1m structure cut the pipe into lengths of approximately 2m. - Plastic sheeting.
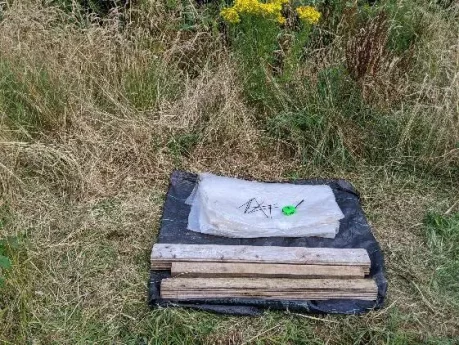
It is advised to buy specialised polytunnel polythene sheeting. As it is temporary a thin weight is fine and small sections are cheap on eBay. For a 1m² structure we suggest 3m x 3m of sheeting. It’s generous, but the extra length will be handy. - Cable ties, tape measure and some anchor weights.
Blocks of wood are advised as you can wrap the plastic around them. You can also use stones – just be careful of sharp edges ripping the sheeting. - A plant for reference!
This guide uses a 7 week old Stromboli Auto in a pot to get an idea of height.
-
€25.50 – €69.50
€19.13 – €52.13 Select options This product has multiple variants. The options may be chosen on the product page

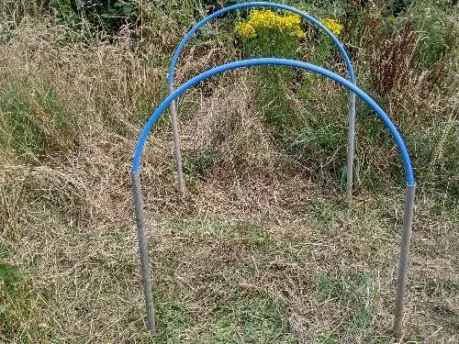
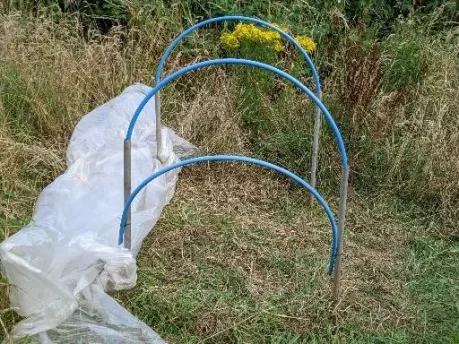
Build an easy cannabis polytunnel: Poles and hoops
- First, put the poles in the ground. It helps if you measure the plot first to make sure it’s square. Poles go in the ground, approximately 10 – 20 cm deep. Next, place the plastic hoop ends inside the poles.
- To help manage the doorway, attach a third hoop with cable ties at the ‘front’. This will help to manage the plastic sheeting and keep things tidy! Don’t pull too tight until the plastic is on, so you can move it up and down if needed.
- Before you roll out the plastic sheeting, check the height of the hoops and if the weed plants are going to be a comfortable fit within the polytunnel.
* Got a height issue? If your poles aren’t long enough, dig out the ground to buy yourself some more centimeters for your pots!
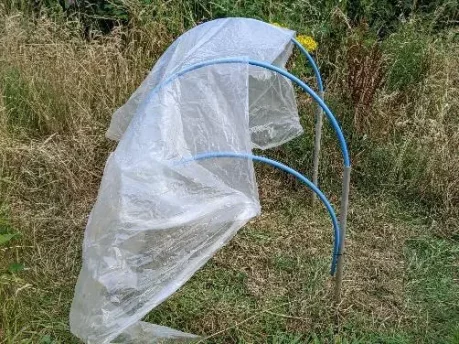
Build an easy cannabis polytunnel: Plastic sheeting
- Start from one side and pull the sheeting over the hoops. There will be excess sheeting on each side so make sure it’s equal. Use your anchor weights to secure in place. Wrap the excess sheeting around the blocks of wood.
- At this stage the plastic sheeting will still be saggy. Don’t worry about this yet. Just secure the sheeting. Thread the corners around the poles and tie in a single knot. Tuck the ends beneath the anchors.
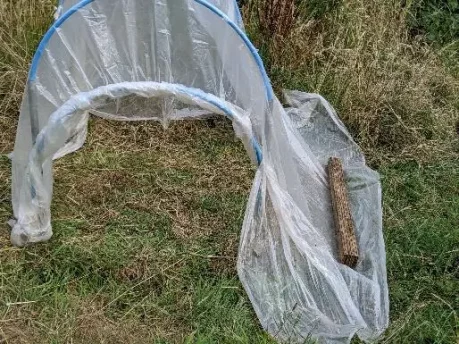
- To make the doorway tidy, tuck the sheeting around the hoop (do this from under the hoop). This gives some nice airflow through the front of the structure. You can also add a hoop at the back to improve this aspect. If rain showers are particularly heavy, you can roll these sections down to give more protection.
- Now, increase the tension so that the plastic sheeting sits tighter over the hoops. You can hold in place with cable ties, but we advise against this as strong winds will rip the plastic at these points. The best way to secure the sheeting is through anchoring and tying to poles.
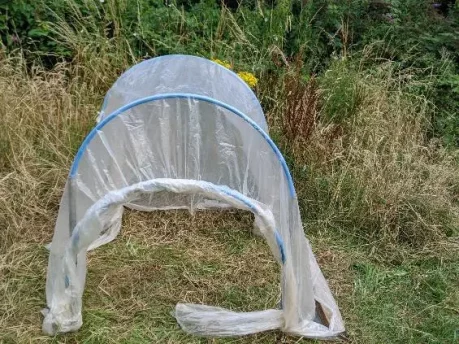
Build an easy cannabis polytunnel: Tweaks!
Once the structure is up and the plastic sheeting is secure lay down your base mat. With the base you can lay slug pellets – when the rain comes, so do slugs and snails – without harming the ground.
Conclusion:
This structure is surprisingly robust once the sheeting is wrapped tight and the anchors are in place, but make whatever tweaks are needed to secure it. Just ensure that there is good airflow – even if it’s not raining the humidity in the air can cause problems with mold.
For the simple cannabis polytunnel you will have to buy a couple of items, but be resourceful – recycle, upcycle, use what is around you! This is a template, but it is very adaptable. Good luck!
-
🏆 Sale!

€39.50 – €108.00
€29.63 – €81.00 Select options This product has multiple variants. The options may be chosen on the product page -
🏆
 €35.50 – €96.50 Select options This product has multiple variants. The options may be chosen on the product page
 -
 €29.50 – €79.00 Select options This product has multiple variants. The options may be chosen on the product page
 -
🏆
 €22.50 – €59.50 Select options This product has multiple variants. The options may be chosen on the product page