The growing process has many ‘crucial’ stages along the way.
While big buds and big harvests get all the headlines (or Instagram photos), what comes next is perhaps one of the most significant stages of all – the cannabis dry and cure process.
If you get the cannabis dry and cure process wrong you could find yourself with a harvest of buds that smells like hay or damp washing.
Get the cannabis dry and cure process right however and you will be rewarded with a harvest of prime bud smelling just how it should – radiating the full spectrum of terpenes associated with the strain.
One of the biggest mistakes a grower can make is to try and rush this process.
Like the old saying says, ‘good things come to those who wait’! There is nothing more disappointing for the end consumer than rolling up the first joint from a new batch and discovering that the weed is still wet.
This is particularly a problem with commercial cannabis and just one of the many negatives of relying on ‘street weed’ as a source of supply.
Unscrupulous dealers will factor wet weed into their marketing plans as obviously this will weigh more than well dried and cured cannabis nuggets.
How long does it take to dry and cure cannabis?
This will depend on the trimming method you have used when chopping down your plants – wet trim or dry trim. The wet trim technique will speed up the process because much of the leaf matter (which will hold in moisture) is removed. On the other hand, the dry trim technique sees the branches hung to dry before the buds are trimmed.
However as a general rule, the drying process should last at least 5 -6 days (and can be as long as 14 days).
It is vitally important that your buds are dry before they go into the next stage – the curing process. If they enter this stage wet, at best the weed smell will suffer and at worst mold will infect the buds.
Optimum drying conditions involve good airflow and a constant temperature of 18 – 20 degrees centigrade (64 – 68 degrees Fahrenheit) for a few days before dropping down a couple of degrees.
A good rule of thumb to test if buds are ready for storing and curing is to bend a stalk. If it snaps (rather than bends) then it is ready for the next stage.
Why is it Necessary to Cure Cannabis?
Curing will not only improve the smell, taste and consistency of buds, but it also has a scientific value too.
Through the process of biosynthesis, during this stage, the various cannabis compounds will blend and some will mutate, producing more potency in the cannabis. Curing weed correctly will not only boost taste and strength but it will allow for long term storage.
This is especially important for those who grow for self sufficiency.
Do this right and an outdoor gardener – who crops once a year for example – can expect their buds to still be consumable right up until the next harvest.
Many strains, cured correctly for a few months, will become enhanced, much like a good wine, with a rounded taste and effect (far more mellow and full bodied than ‘buzzy’ fresh bud that can also bring an element of anxiety to the experience).
What is the Best Way to Dry Cannabis?
As with every aspect of growing cannabis, each grower has their own tried and tested technique. A little like the growing process, the cannabis dry and cure stage depends very much on personal circumstances and the space available for the grower to use.
Drying inside a grow tent (with an extractor fan in use and an auxillary form of heat – such as a greenhouse heater or a small domestic heater on a timer – preferably with a thermostat to keep the temperature stable) is the favored choice of many growers, with the cannabis ‘hung’ or buds spread out in a drying net.
Some growers will follow this stage by placing the dried buds into a shoe box or paper bag and place them in a warm cupboard to finish them off before placing them in their curing container.
-
🏆 Sale!
€39.50 – €108.00
€29.63 – €81.00 Select options This product has multiple variants. The options may be chosen on the product page -
€35.50 – €96.50 Select options This product has multiple variants. The options may be chosen on the product page
-
€29.50 – €79.00 Select options This product has multiple variants. The options may be chosen on the product page
-
€22.50 – €59.50 Select options This product has multiple variants. The options may be chosen on the product page
-
€25.50 – €69.50
€19.13 – €52.13 Select options This product has multiple variants. The options may be chosen on the product page -
€29.50 – €79.00 Select options This product has multiple variants. The options may be chosen on the product page
What is the Best Way to Cure Cannabis?
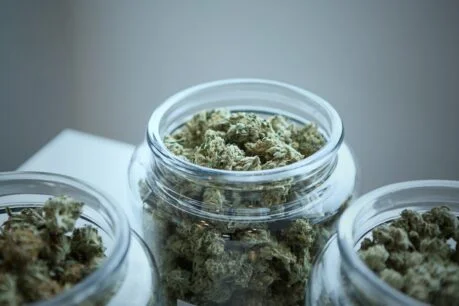
The best form of container to use, in the Paradise experience, is a glass preserve jar (also known as a kilner or mason jar), which comes with an airtight seal.
The space should be filled with buds although it is important that it is a comfortable fit and they are not packed in. The jar should be placed in a dark cool space to let the buds sit and start the curing process.
For the first few days, it is important to allow the bud inside the container to breathe, for a few minutes. When sealed, the buds will push out excess moisture and this procedure will help to take this moisture away.
For the first week, aim to do two or three times a day, in week 2 once a day and in week 3 do it occasionally (check the consistency of the buds to judge if it is still necessary). One word of caution – if you open the jar and get a whiff of ammonia, the buds went in too damp).
For long term storage, keep in a cool dark place – your very own ‘bud cellar’! It’s a good idea to remove a chunk and store in a separate jar for daily/weekly use, rather than keep dipping into the big jar (to avoid disturbing buds too much or letting in unnecessary moisture).
Follow these steps, appreciate the art (and importance) of curing, and you will be richly rewarded and don’t forget the mantra – Good things come to those who wait!


